Monero / Privacy / RetoSwap
How to Use RetoSwap on Tails and Whonix
Set up RetoSwap on Whonix, assess its Tails installer, and check Tor routing, escrow, deposits, wallet backups and recovery before funding a trade.
RetoSwap lets people buy and sell Monero through a peer-to-peer market. Traders agree on a payment method, lock Monero in multisignature escrow and complete the payment outside that escrow. If they disagree, an arbitrator can help resolve the trade.
That is different from a BasicSwap atomic swap. RetoSwap can accommodate bank payments and other methods that cannot participate in a cryptographic atomic swap. Those methods introduce their own identity, chargeback and dispute risks.
Whonix and Tails require different installations. Whonix provides a persistent Workstation behind a separate Tor Gateway. Tails has a documented RetoSwap installer, but keeping trade state across sessions requires encrypted persistence and a working launcher after every reboot.
Verification status, November 7, 2026. This guide reviews RetoSwap 1.12.0-reto and its upstream Haveno 1.12.0 code, both released October 29. The RetoSwap package signature passed a local check. Installation, Tor connectivity, reboot recovery and trades have not been tested on Whonix or Tails. Whonix's RetoSwap page is community-maintained and its worked example predates these releases. Treat the updated Whonix procedure as an integration to test before funding.
Choose the software and network separately
Haveno upstream develops the software but does not operate or endorse a mainnet network. A network supplies its own installer, seed nodes, arbitrators, rules and fees. Different networks built from Haveno need not share an order book.
This guide uses RetoSwap's release repository as a concrete example because the Whonix instructions document it. That is not an endorsement of its operators or a promise about available offers.
Before choosing a network, compare the download links across its website and repository. Read its trading rules, dispute process and fee schedule. Establish the release signing key from more than the download page alone. A correctly signed package shows who signed those bytes. It does not prove that a network is honest or that its arbitrators will decide a dispute correctly.
Understand escrow, deposits and payment risks
The upstream trade protocol uses a two-of-three Monero multisignature arrangement involving buyer, seller and arbitrator. Cooperative traders can release the escrow. An arbitrator can work with one trader during a dispute, but cannot spend it alone. This still leaves risks from collusion, disputed evidence and mistakes in payment instructions.
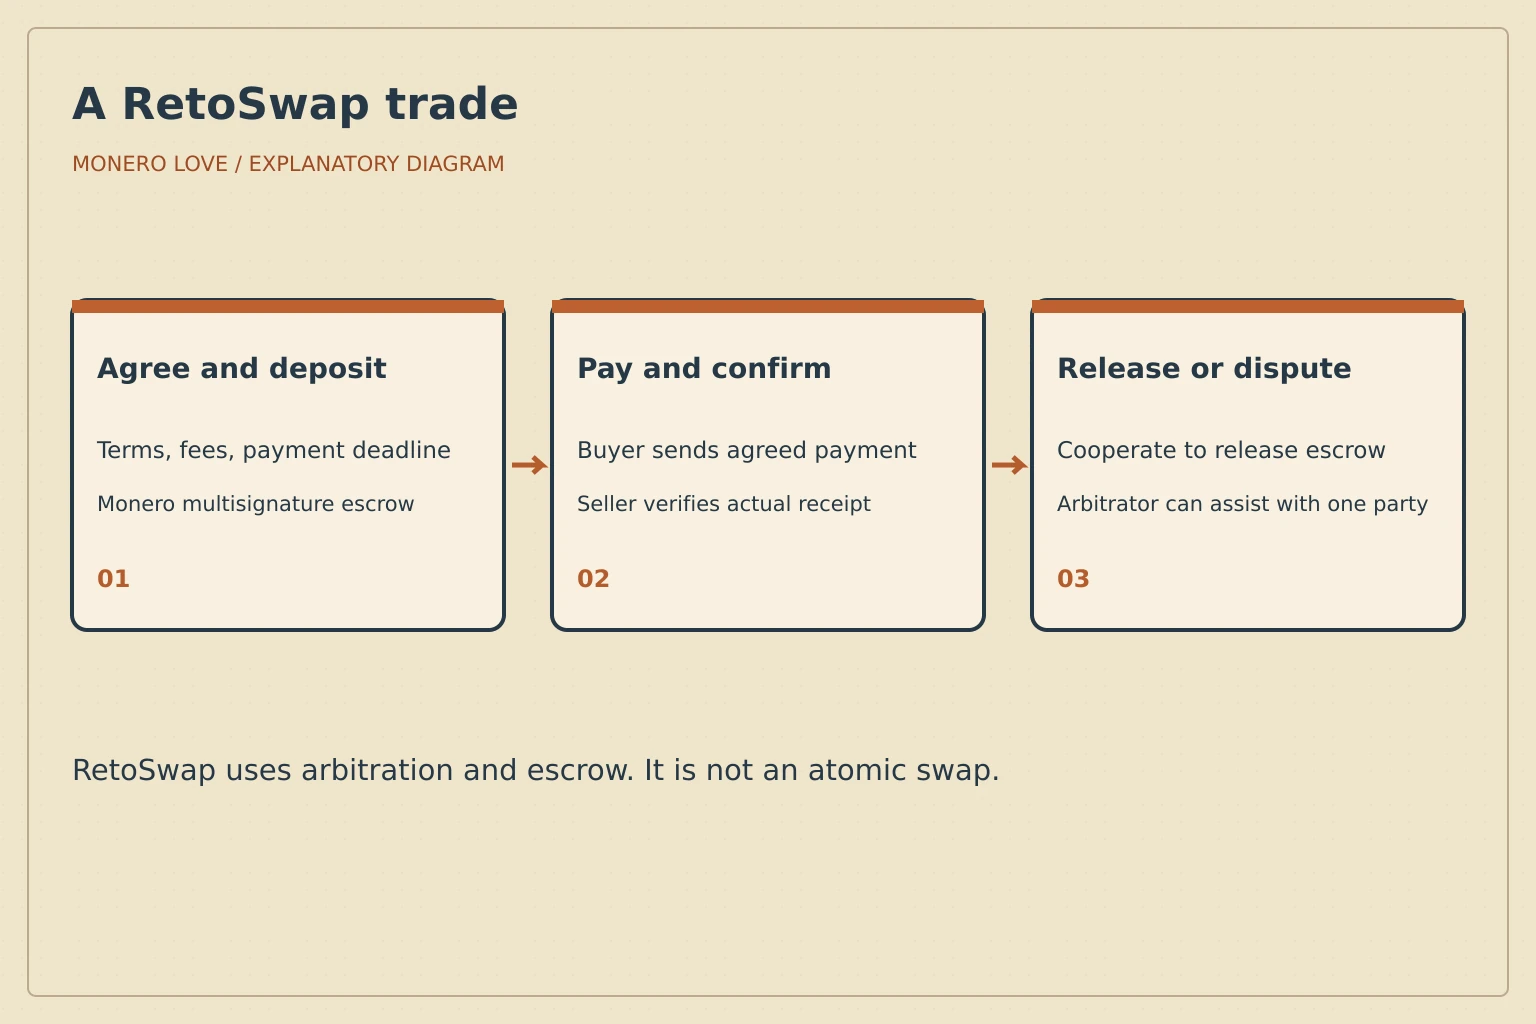
The external payment and the escrow release are separate actions. RetoSwap does not make a bank transfer atomic.
Deposits discourage abandoned or dishonest trades. They are not a fee paid automatically to the counterparty. The offer determines the amount and the network's rules determine how a dispute may affect it. The upstream FAQ also describes restricted no-deposit buyer offers. Do not assume that every offer requires the same percentage or that every buyer qualifies for an exception.
For illustration, a 1 XMR trade with a 15% deposit from each side would require 0.15 XMR from the buyer and 1.15 XMR from the seller before fees. The escrow would contain 1.30 XMR. These figures illustrate the deposit calculation. Check the amounts in your actual offer.
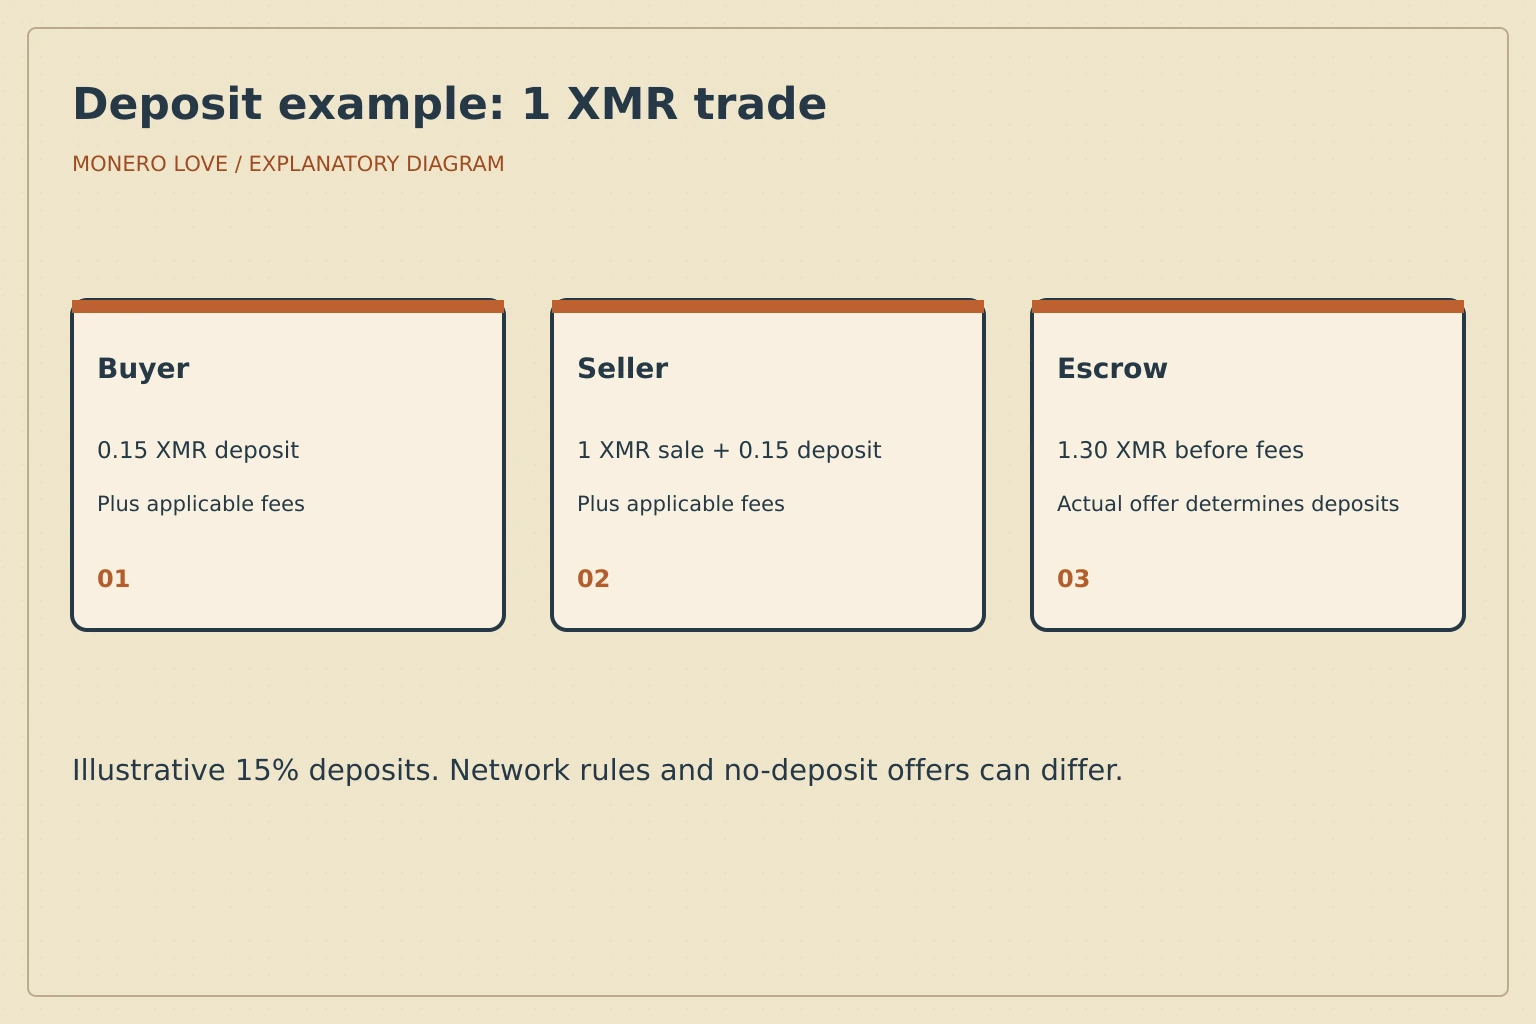
Read the actual offer. Deposits, trading fees and Monero transaction fees are different charges.
Tor hides a direct network connection from the trading peer. It does not remove a name from a bank transfer, make a reversible payment final, or prevent a counterparty from retaining payment details. Choose a payment method whose identity exposure and dispute evidence you understand.
Prepare a persistent Whonix Workstation
Use a dedicated Workstation with only the normal internal connection to Whonix-Gateway. Do not add a NAT or bridged adapter to get around a connectivity problem. Keep the Gateway free of trading software and wallet files.
The current Whonix release reviewed here is 18.2.4.3. For an unfunded test, an amd64 Workstation with 4 GiB RAM and 30 GiB free disk is a starting allocation, not a measured minimum. A local Monero blockchain requires much more storage. Reserve room for application updates, logs and backups even when using a remote daemon.
Update both VMs. Where Whonix uses separate user and sysmaint accounts, enter the SYSMAINT maintenance session for privileged commands. Do not change the daily account's privileges.
sudo apt update
sudo apt full-upgrade
In the Workstation maintenance session, install the download and verification tools:
sudo apt install --no-install-recommends curl gnupg
Follow the Whonix software installation procedure, reboot when required, and return to the normal user for downloads and verification. The network-provided binary package is the installation route below. Building the upstream software from source is a separate procedure with its own JDK 21 requirements.
Download and verify RetoSwap
These commands select the release reviewed for this guide. Check for a newer release and its notes before a later installation. Use Bash in the Workstation:
umask 077
mkdir -p "$HOME/Downloads/haveno-verify"
cd "$HOME/Downloads/haveno-verify"
RETO_BASE='https://github.com/retoaccess1/haveno-reto/releases/download/v1.12.0-reto'
RETO_FILE='haveno-v1.12.0-linux-x86_64-installer.deb'
curl --fail --location --remote-name "$RETO_BASE/$RETO_FILE"
curl --fail --location --remote-name "$RETO_BASE/$RETO_FILE.sig"
curl --fail --location --output reto_public.asc https://retoswap.com/reto_public.asc
mkdir -m 700 verify-keyring
gpg --homedir ./verify-keyring --import reto_public.asc
gpg --homedir ./verify-keyring --fingerprint
gpg --homedir ./verify-keyring --verify "$RETO_FILE.sig" "$RETO_FILE"
The reviewed key fingerprint is DAA24D878B8D36C90120A897CA02DAC12DAE2D0F. Compare the full fingerprint with the network's published key before accepting the signature. We downloaded this release and obtained a valid signature from that key. GPG's warning about an uncertified key concerns identity trust. It is not permission to ignore a bad signature or an unexpected signer.
If any download fails, the signature is invalid or the fingerprint differs, stop. A SHA-256 checksum can help compare copies of a file but does not replace an authenticated signature.
In the Workstation maintenance session, install the verified local package from its actual path:
sudo apt install /home/user/Downloads/haveno-verify/haveno-v1.12.0-linux-x86_64-installer.deb
Adjust /home/user only if your ordinary account has a different home. Do not download a second unverified copy as root. Let APT report package dependencies and stop on errors instead of adding unrelated Java packages until it launches.
Configure RetoSwap's onion peer service
RetoSwap needs incoming peer connectivity as well as outbound Tor connections. The documented DirectBindTor approach uses an onion service on Whonix-Gateway and a peer listener in the Workstation. It avoids starting an additional Tor daemon inside the Workstation.
First find the Workstation's internal IPv4 address:
ip -4 addr
The default Non-Qubes-Whonix example is 10.152.152.11. Do not copy it into Qubes or a customized VM network without checking. In the Gateway's maintenance session, edit:
sudoedit /usr/local/etc/torrc.d/50_user.conf
Add this block, replacing the destination if your Workstation has a different internal address:
HiddenServiceDir /var/lib/tor/haveno_service/
HiddenServicePort 9999 10.152.152.11:9999
Verify before reloading:
sudo -u debian-tor tor --verify-config
sudo systemctl reload tor@default.service
sudo systemctl status tor@default.service
sudo cat /var/lib/tor/haveno_service/hostname
Stop if validation fails. Transfer the resulting public onion hostname to the Workstation. Keep the service's private key on the Gateway and include it in protected backups.
In the Workstation maintenance session, open the Whonix user firewall configuration:
sudoedit /usr/local/etc/whonix_firewall.d/50_user.conf
Add the peer port and reload:
EXTERNAL_OPEN_PORTS+=" 9999 "
The preceding line belongs in the configuration file. Run this separately in the terminal:
sudo whonix_firewall
This permits the peer listener, not a wallet RPC API. Do not forward other application ports or enable a management API through the onion service.
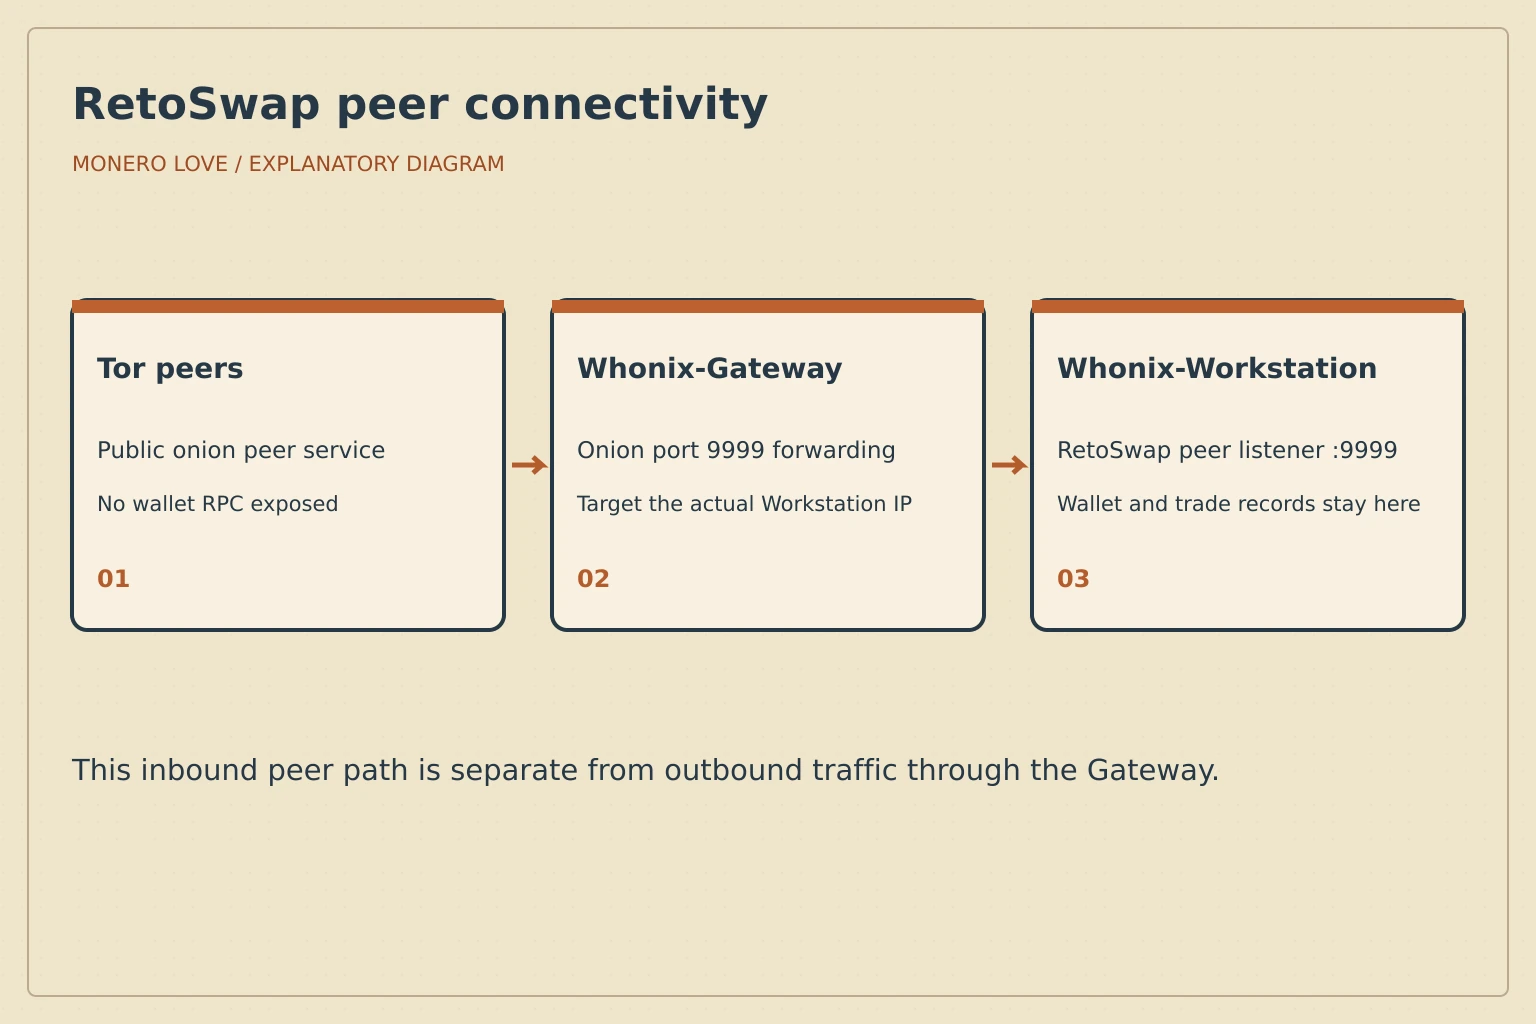
Only the RetoSwap peer service is forwarded. The wallet and trade database remain in the Workstation.
Return to the ordinary Workstation session. Start RetoSwap using the actual generated hostname:
read -r -p 'Gateway onion hostname: ' HAVENO_ONION
/opt/haveno/bin/Haveno --hiddenServiceAddress="$HAVENO_ONION" --nodePort=9999
The DirectBind implementation sends outgoing peer connections through SOCKS at 127.0.0.1:9050. This is a verified source setting, not a port to guess. Whonix forwards that local endpoint to the Gateway without running another Tor daemon in the Workstation. Check it before funding:
curl --fail --max-time 60 --socks5-hostname 127.0.0.1:9050 \
  https://check.torproject.org/api/ip
This checks the SOCKS route and sends hostname resolution through the proxy. If it fails, diagnose Whonix's forwarding and Gateway before starting a trade.
The released configuration source defines these options. Do not invent a SOCKS port or copy Tails' proxy settings into Whonix. For repeat launches, the community instructions document hiddenServiceAddress and nodePort in ~/.local/share/Haveno-reto/haveno.properties. Preserve existing settings and confirm that a clean restart uses the same identity.
Initialize and check before funding
Allow Tor peer discovery and Monero wallet synchronization to finish. Review the application's connections and selected daemon. A remote daemon can observe requests and transaction broadcasts and can delay or mislead the client. Tor does not make it equivalent to your own independently synchronized node.
Keep any local wallet RPC interface on loopback. Do not make wallet RPC reachable from the Gateway or another qube. If you run your own daemon, distinguish its restricted blockchain RPC from a wallet RPC service holding spending authority.
In the Workstation, inspect the route, listeners and one Tor request:
ip route
ss -lntp
curl --fail --max-time 60 https://check.torproject.org/api/ip
The curl response should report IsTor: true. It proves the route of that request, not RetoSwap's complete behavior. Check RetoSwap's peer connections and wallet sync separately. Test a Gateway interruption with empty wallets and verify the application loses external connectivity. Restore the Gateway and confirm recovery without changing the Workstation network adapters.
Set a wallet password, record the recovery information offered by the application and make an encrypted backup. Never paste a seed into support chat. Check the receiving address in Funds → Receive funds and confirm you are using the intended network before transferring anything.
Make or accept a RetoSwap offer
This walkthrough follows the documentation. We have not performed a trade with this setup. For a live trade, first establish that your installation reconnects correctly after a clean restart.
- Create a payment account in Account using the details required by your chosen method. Those details may identify you to the counterparty.
- Open the appropriate Buy XMR or Sell XMR market. Confirm the currency and payment method.
- Compare the rate, trade amount, limits, deposits, fees, payment deadline and offer terms. A low price does not cancel the risks of a reversible payment.
- To make an offer, select the create-offer action, enter those terms and review the final funding requirement. To take one, review the existing terms before accepting.
- Fund the displayed requirement from your RetoSwap balance or the supported external-wallet funding flow. Account for unlocked funds and transaction fees.
- Wait for the application to confirm the escrow stage. Do not send the external payment early because someone asks you to in a separate chat.
- The buyer sends the exact agreed payment and marks it sent only after doing so. The seller checks actual receipt through the payment provider before confirming.
- Follow the application through payout and inspect the resulting wallet balance and confirmations. Save the trade record and back up the updated state.
The official getting-started guide documents the interface and funding flow. We did not check live liquidity or complete a transaction.
If payment does not arrive, details differ or a deadline passes, use the documented dispute process. Preserve trade messages and payment evidence. Do not release funds because of a screenshot, abandon the application, or start a second trade to repair the first. An arbitrator needs the relevant evidence, never your seed or private wallet keys.
Run RetoSwap on Tails only after a recovery test
Unlike BasicSwap, RetoSwap has an upstream Tails installation procedure. It requires encrypted Persistent Storage, the Dotfiles feature and an administration password chosen at startup. The reviewed installer places application data under /home/amnesia/Persistent/haveno/Data/ and installs launcher resources that handle Tails-specific Tor access.
The reviewed Tails release is 7.16. This guide has not tested that release with RetoSwap 1.12.0-reto. Documented installation support is not evidence that a USB device, reboot sequence and network connection will keep the application available throughout a trade.
After enabling Persistent Storage and Dotfiles, download the upstream helper rather than piping a network response directly into a shell:
cd "$HOME/Persistent"
curl --fail --location --output haveno-install.sh \
  https://raw.githubusercontent.com/haveno-dex/haveno/v1.12.0/scripts/install_tails/haveno-install.sh
less haveno-install.sh
bash haveno-install.sh \
  https://github.com/retoaccess1/haveno-reto/releases/download/v1.12.0-reto/haveno-v1.12.0-linux-x86_64-installer.deb \
  DAA24D878B8D36C90120A897CA02DAC12DAE2D0F
The helper verifies the network package but also downloads launcher assets from upstream's moving master branch. Those assets can change even when you use this pinned script. Inspect those resources and the current release instructions before running it. This route is officially documented but not locally tested here.
Start the installed launcher under Applications → Other. The launcher source uses Tails' Tor control service and a separate Monero SOCKS endpoint. Do not replace it with the Whonix DirectBind command. On upgrades, follow the complete network installer procedure rather than replacing only the .deb and leaving old launcher files behind.
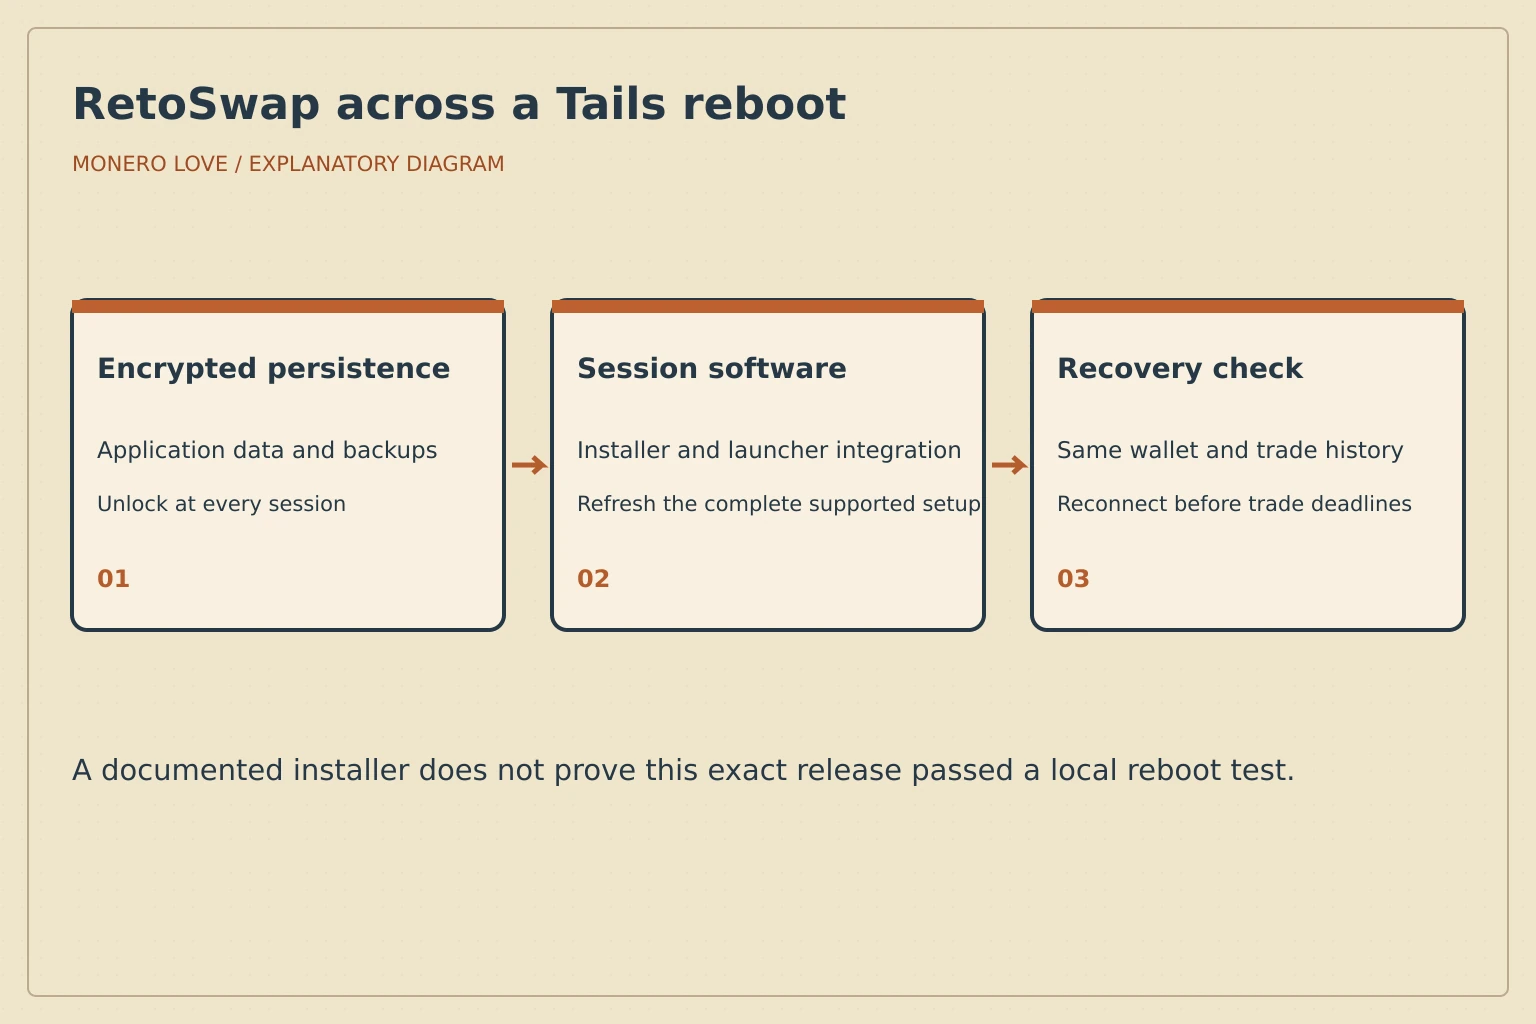
Before funding, reboot with empty wallets, unlock persistence, start RetoSwap again and confirm the same wallet, application identity and trade history return. Check Tor and daemon connectivity again. Test restoring an encrypted backup separately. Keep a second backup off the USB stick.
Do not use a machine that must shut down before the payment or dispute deadline. Tails can preserve files without keeping a stopped process online. A persistent Whonix installation or the Qubes swapping workstation is a more suitable candidate when uninterrupted operation matters, once its integration has passed the same checks.
Back up and diagnose without destroying state
On Linux, RetoSwap normally uses ~/.local/share/Haveno-reto/. Upstream Haveno and other networks can use different directories. Confirm the actual directory before copying anything. Stop the application cleanly and back up the complete data, payment accounts and recovery information to encrypted storage. Back up the Gateway onion identity separately when using DirectBindTor.
A seed alone does not recreate trade messages, payment accounts or an unfinished arbitration. Do not run duplicate restored copies of an active wallet. Finish trades before migration whenever possible.
| Problem | First check |
|---|---|
| Package will not install | Architecture, signature and APT's exact dependency error |
| No peers | Gateway Tor status, onion hostname, target IP and Workstation port 9999 |
| Wallet will not synchronize | Daemon availability, disk space, connection settings and wallet scanning progress |
| Funds appear insufficient | Unlocked balance, deposit, trading fee and transaction fees |
| Trade is stalled | Current trade stage, payment deadline and dispute instructions |
| Data disappeared after Tails reboot | Persistence unlocked, Dotfiles enabled, correct launcher and data directory |
| Failure after an upgrade | Network release notes and complete launcher update |
Use df -h "$HOME" and ss -lntp before changing configuration. Read logs locally and remove credentials, private keys, payment details and identifying information before seeking help. Never delete the wallet or trade database to make a startup error disappear.